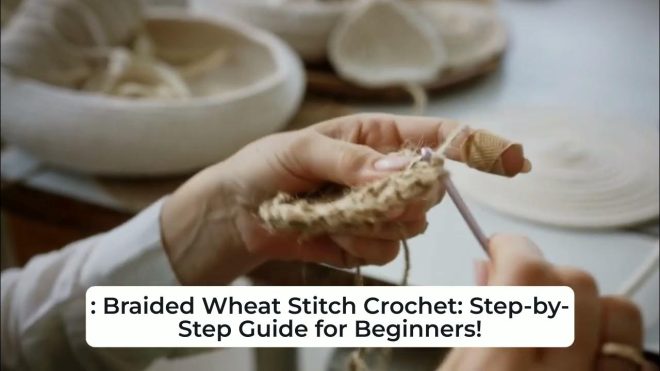
Braided Wheat Stitch Crochet: Step-by-Step Guide for Beginners
If you’re looking to elevate your crochet skills, the Braided Wheat Stitch is a fantastic technique to learn. This stitch creates a beautiful, textured pattern that resembles braided wheat, making it the perfect choice for a variety of projects, from blankets to scarves. In this step-by-step guide, we’ll break down the process of mastering the Braided Wheat Stitch, making it easy for beginners to follow along.
What You Need to Get Started
Before diving into the Braided Wheat Stitch, gather the necessary materials. You’ll need:

– **Yarn**: Choose a medium-weight yarn for easy handling.
– **Crochet Hook**: Select a hook size that matches your yarn (typically 5.0mm to 6.0mm).
– **Scissors**: For cutting yarn.
– **Tapestry Needle**: To weave in ends once your project is complete.
Having the right tools on hand will make your crochet experience smoother and more enjoyable.
- YOU MAY ALSO LIKE TO WATCH THIS TRENDING STORY ON YOUTUBE. Waverly Hills Hospital's Horror Story: The Most Haunted Room 502
Understanding the Braided Wheat Stitch
The Braided Wheat Stitch is characterized by its unique texture, which mimics the look of braided wheat. This stitch involves a combination of front post double crochets and back post double crochets to achieve its dimensional appearance. While it may seem complex, with practice, you’ll find it to be a rewarding technique that adds depth to your crochet projects.
Step-by-Step Instructions
Let’s break down the Braided Wheat Stitch into manageable steps.
1. **Foundation Chain**: Start by creating a foundation chain that is a multiple of 4 plus 2 additional chains. For example, if you chain 20, your total will be 22.
2. **Row 1 – Double Crochet**: In the fourth chain from the hook, make a double crochet. Continue to double crochet in each chain across the row. This will give you a solid foundation.
3. **Row 2 – Braided Wheat Stitch Setup**: Turn your work. Chain 2 (this counts as your first double crochet). Now, you will work the Braided Wheat Stitch.
4. **Creating the Braided Wheat Stitch**:
– Yarn over and insert your hook into the next stitch.
– Pull up a loop, yarn over again, and pull through the first two loops on your hook.
– Now, yarn over and pull through the remaining two loops. This is your first double crochet.
– For the next stitch, yarn over, insert your hook around the post of the previous double crochet from the back to the front (this is the front post double crochet).
– Yarn over again, pull up a loop, yarn over, and pull through the first two loops. Yarn over and pull through the remaining two loops.
– Continue alternating between regular double crochets and front post double crochets across the row.
5. **Row 3 – Building the Texture**: Turn your work. Chain 2 and repeat the Braided Wheat Stitch sequence. Remember to always work your front post double crochets around the front post double crochets from the previous row and your regular double crochets into the regular double crochets.
6. **Continue the Pattern**: Repeat Row 3 until your piece reaches the desired length. The more rows you complete, the more pronounced the braided texture will become.
Tips for Success
– **Practice Makes Perfect**: If you’re new to crochet, don’t get discouraged if the stitch doesn’t look perfect immediately. Practice the Braided Wheat Stitch multiple times to get comfortable with the technique.
– **Count Your Stitches**: It’s easy to lose track of your stitches, especially when alternating between different types. Counting your stitches at the end of each row can help you maintain the correct stitch amount.
– **Use Stitch Markers**: If you’re working on a larger project, consider using stitch markers to mark the beginning of each row. This will help you keep your place and ensure your pattern stays consistent.
Project Ideas Using the Braided Wheat Stitch
Once you’ve mastered the Braided Wheat Stitch, you can incorporate it into a variety of projects:
– **Blankets**: Create a cozy throw blanket that features the Braided Wheat Stitch for added warmth and texture.
– **Scarves**: A stylish scarf made with this stitch will not only keep you warm but also serve as a fashionable accessory.
– **Home Decor**: Consider using the Braided Wheat Stitch for pillow covers or table runners to add a touch of texture to your home.
Conclusion
The Braided Wheat Stitch is an excellent addition to any crochet repertoire, providing both beginners and experienced crocheters with a versatile and visually appealing option for various projects. By following this step-by-step guide, you’ll be well on your way to mastering this beautiful stitch. Remember to practice and enjoy the process! With time and effort, you’ll create stunning pieces that showcase your newfound crochet skills. Happy crocheting!
Braided Wheat Stitch Crochet: Step-by-Step Guide for Beginners!
Braided Wheat Stitch Crochet: Step-by-Step Guide for Beginners!
If you’re diving into the world of crochet, you might be looking for a stitch that’s both beautiful and easy to master. Enter the Braided Wheat Stitch! This stitch not only adds a lovely texture to your projects but also creates a stunning visual effect that looks complicated but is super beginner-friendly. So grab your yarn and hook, and let’s get started!
Braided Wheat Stitch Crochet: Step-by-Step Guide for Beginners!
The Braided Wheat Stitch is a fantastic choice for scarves, blankets, and even garments. It’s versatile and can be worked in various yarn weights, making it perfect for just about any project you have in mind. Plus, once you get the hang of it, you’ll be able to whip up beautiful creations in no time!
Braided Wheat Stitch Crochet: Step-by-Step Guide for Beginners!
Before we dive into the tutorial, let’s gather our supplies. For the Braided Wheat Stitch, you’ll need:
- Your favorite yarn (medium weight is recommended)
- A crochet hook that matches your yarn (usually a size H or I)
- Scissors
- Tapestry needle for weaving in ends
Now that you have everything ready, let’s get into the actual Braided Wheat Stitch crochet process!
Braided Wheat Stitch Crochet: Step-by-Step Guide for Beginners!
1. **Make a Slip Knot**: Start by making a slip knot on your hook. This is the first step in every crochet project. If you’re unsure how to make a slip knot, check out this simple guide!
2. **Chain Your Stitches**: Chain a multiple of 4 plus 2. For beginners, a good starting chain length is 18 (which gives you 16 stitches plus 2). This will create a nice width for your project.
3. **Row 1 – Foundation Row**: Start in the second chain from your hook. Work one single crochet in each chain across the row. This sets a solid foundation for the beautiful Braided Wheat Stitch.
Braided Wheat Stitch Crochet: Step-by-Step Guide for Beginners!
4. **Row 2 – Begin the Braided Wheat Stitch**: Chain 1 and turn your work. In the first stitch, work a single crochet. Then, skip the next stitch. In the following stitch, you’re going to create a double crochet (dc). Here’s the fun part: instead of finishing the dc, leave the last two loops on your hook. Now, you’ll yarn over and insert your hook into the skipped stitch, yarn over again, and pull through. You should have four loops on your hook. Yarn over and pull through the first two loops, then yarn over and pull through the last two loops. This is your first braided stitch!
5. **Continue the Pattern**: You will now repeat the process: skip one stitch, double crochet in the next, yarn over, pull through the skipped stitch, and then finish the double crochet. Repeat this across the row until you reach the end. Make sure to always end with a single crochet in the last stitch to keep your edges neat.
Braided Wheat Stitch Crochet: Step-by-Step Guide for Beginners!
6. **Row 3 – Building on Your Stitches**: Chain 1 and turn your work. Again, start with a single crochet in the first stitch. Now, for the next stitch, you’ll want to work another Braided Wheat Stitch just like before. Repeat the process across the row, making sure to finish with a single crochet at the end.
7. **Repeat Rows**: Keep repeating Row 2 and Row 3 until your project reaches the desired length. The more you practice, the easier it will become, and soon you’ll be doing it without even thinking!
Braided Wheat Stitch Crochet: Step-by-Step Guide for Beginners!
8. **Finishing Up**: Once you’ve reached your desired length, finish with a row of single crochet to give it a polished look. Cut your yarn, leaving a tail for weaving in. Pull the yarn through the last loop to secure it.
9. **Weaving in Ends**: Using a tapestry needle, weave in any loose ends to keep your project looking tidy. A well-finished piece always looks more professional!
Braided Wheat Stitch Crochet: Step-by-Step Guide for Beginners!
Now that you’ve mastered the Braided Wheat Stitch, you can create all sorts of lovely items! Think cozy scarves, stylish blankets, or even a trendy shawl. The possibilities are endless! You can also experiment with color combinations to make your work truly unique.
If you’re looking for inspiration, check out Ravelry for a plethora of free and paid patterns featuring the Braided Wheat Stitch.
Braided Wheat Stitch Crochet: Step-by-Step Guide for Beginners!
Besides being a beautiful stitch, the Braided Wheat Stitch is also an excellent way to practice your crochet skills. As you become more comfortable with the technique, you can start combining it with other stitches for even more intricate designs. The sky’s the limit!
And remember, practice makes perfect! Don’t get discouraged if your first few attempts don’t turn out exactly as you envisioned. Each project is a learning experience, and with each stitch, you are improving your skills.
Braided Wheat Stitch Crochet: Step-by-Step Guide for Beginners!
Lastly, join communities like Facebook Crochet Groups or forums to share your work, ask questions, and connect with fellow crochet enthusiasts. It’s a great way to keep motivated and inspired!